Hướng dẫn phân trang trong Thymeleaf và Spring Boot
Link Source: Hướng dẫn phân trang trong Thymeleaf và Spring Boot
Thể loại: Java, Lập trình
Tags: Hibernate Framework, Học hành, Lập trình, Spring Framework
Pagination in Spring Boot and Thymeleaf
Hướng dẫn phân trang trong Thymeleaf và Spring Boot
Tiếp tục bài viết Lập trình Spring Boot CRUD đơn giản MyEmployee nếu bạn chưa xem bài đó vui lòng xem nó trước khi tiếp tục bài này nhé. Mình sẽ hướng dẫn các bạn cách phân trang trong Thymeleaf và Spring Boot dùng PlacedListHolder.
PlacedListHolder giúp chúng ta phân trang theo danh sách List<Object>. Để hiểu rõ về PlacedListHolder hơn chúng ta sẽ tìm hiểu tiếp phía dưới.
Lưu ý: Bài này tiếp tục bài viết Lập trình Spring Boot CRUD đơn giản MyEmployee nếu bạn chưa xem bài đó vui lòng xem nó và tải source code về làm tiếp bài này nhé!
Không dài dòng nữa tiến hành vào phần chính hướng dẫn phân trang cho project Spring Framework dùng PagedListHolder.
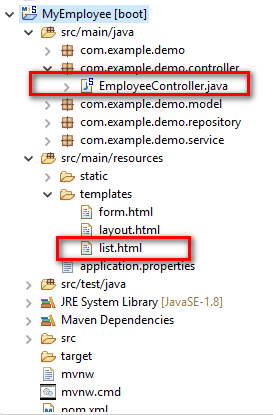
Cấu trúc các file sẽ chỉnh sửa trong project Employee:
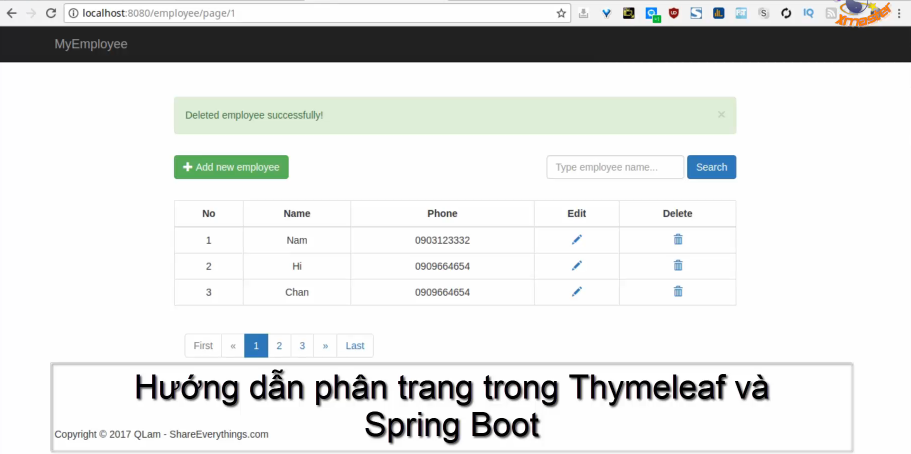
1. Yêu cầu: Phân trang cho bảng danh sách Employee này.
2. Thêm phương thức phân trang vào class EmployeeController:
Để thuận tiện sau này chúng ta thêm getMapping(“/”) cho trang chủ:
@GetMapping("/")
	public String home()
		return "redirect:/employee";
Dưới đây là trang danh sách Employee
@GetMapping("/employee")
	public String index(Model model,HttpServletRequest request
			,RedirectAttributes redirect)
		request.getSession().setAttribute("employeelist", null);

		if(model.asMap().get("success") != null)
			redirect.addFlashAttribute("success",model.asMap().get("success").toString());
		return "redirect:/employee/page/1";
Chúng ta cần HttpServletRequest để tạo session employeelist. Đồng thời khởi tạo session này là null.
Dòng 6,7 mình sẽ giải thích cuối bài. Hiện tại bạn có thể bỏ qua nó.
3. Phương thức phân trang showEmployeePage:
Thêm phương thức showEmployeePage vào EmployeeController
@GetMapping("/employee/page/pageNumber")
	public String showEmployeePage(HttpServletRequest request,
			@PathVariable int pageNumber, Model model)
		PagedListHolder<?> pages = (PagedListHolder<?>) request.getSession().getAttribute("employeelist");
		int pagesize = 3;
		List<Employee> list =(List<Employee>) employeeService.findAll();
		System.out.println(list.size());
		if (pages == null)
			pages = new PagedListHolder<>(list);
			pages.setPageSize(pagesize);
		 else
			final int goToPage = pageNumber - 1;
			if (goToPage <= pages.getPageCount() && goToPage >= 0)
				pages.setPage(goToPage);


		request.getSession().setAttribute("employeelist", pages);
		int current = pages.getPage() + 1;
		int begin = Math.max(1, current - list.size());
		int end = Math.min(begin + 5, pages.getPageCount());
		int totalPageCount = pages.getPageCount();
		String baseUrl = "/employee/page/";

		model.addAttribute("beginIndex", begin);
		model.addAttribute("endIndex", end);
		model.addAttribute("currentIndex", current);
		model.addAttribute("totalPageCount", totalPageCount);
		model.addAttribute("baseUrl", baseUrl);
		model.addAttribute("employees", pages);

		return "list";
Quá trình xử lý của hàm Controller như sau:
Khi chúng ta truy cập vào trang chủ /employee sẽ khởi tạo mới session Employee List là null. Đồng thời nó sẽ chuyển hướng tới trang đầu tiên của danh sách Employee chẳng hạn như: /employee/page/1. Chúng ta sẽ refresh session Employee List nếu chưa khởi tạo, bằng không nó sẽ trả về Page mà người dùng đã truy cập trước đó.
Sau đó sẽ ép session đó sang đối tượng PagedListHolder.(dòng 4)
Nếu đối tượng PagedListHolder là null thì khởi tạo và thiết lập Page Size. Tức là 1 trang bạn muốn hiện bao nhiêu object.(dòng 8)
Thiết lập trang mà chúng ta muốn hiện lên View dựa trên /products/page/pageNumber (dòng 17)
Thiết lập các thông số cho Pagination, sau đó dùng Model Attributes để đưa sang View Thymeleaf.(Dòng 18 – 31)
Nếu bạn thấy vẫn khó hiểu, không sao mình sẽ hướng dẫn từng bước trong video phía dưới.
4. Phân trang Thymeleaf file list.html
Nội dung file list.html sau khi thêm phân trang như sau:
<!DOCTYPE html>
<html xmlns:th="http://www.thymeleaf.org">
<head th:replace="layout :: head"></head>
<body>
	<nav th:replace="layout :: header"></nav>

	<div class="container main-content list">
		<div th:if="$success"
			class="row alert alert-success alert-dismissible">
			<button type="button" class="close" data-dismiss="alert"
				aria-label="Close">
				<span aria-hidden="true">×</span>
			</button>
			<span th:text="$success"></span>
		</div>
		<div class="row">
			<a th:href="@/employee/create" class="btn btn-success pull-left">
				<span class="glyphicon glyphicon-plus"></span> Add new employee
			</a>
			<form class="form-inline pull-right" action="#"
				th:action="@/employee/search" method="GET">
				<div class="form-group">
					<input type="text" class="form-control" name="s"
						placeholder="Type employee name..." />
				</div>
				<button type="submit" class="btn btn-primary">Search</button>
			</form>
		</div>
		<th:block th:if="$#lists.isEmpty(employees.pageList)">
			<h3>No employee</h3>
		</th:block>

		<th:block th:unless="$#lists.isEmpty(employees.pageList)">
		<nav class="row justify-content-center wow fadeIn"
		data-wow-delay="0.2s">
		<div class="row">
				<table class="table table-bordered table-hover">
					<thead>
						<tr>
							<th>No</th>
							<th>Name</th>
							<th>Phone</th>
							<th>Edit</th>
							<th>Delete</th>
						</tr>
					</thead>
					<tbody>
						<tr th:each="contact,iterStat : $employees.pageList">
							<td th:text="$iterStat.count"></td>
							<td th:text="$contact.name"></td>
							<td th:text="$contact.phone"></td>
							<td><a th:href="@/employee/id/edit(id=$contact.id)"><span
									class="glyphicon glyphicon-pencil"></span></a></td>
							<td><a th:href="@/employee/id/delete(id=$contact.id)"><span
									class="glyphicon glyphicon-trash"></span></a></td>
						</tr>
					</tbody>
				</table>
			</div>
		<ul class="pagination">
			<li
				th:class="$currentIndex == 1? 'page-item disabled' : 'page-item'">
				<a class="page-link" th:href="@/employee">First</a>
			</li>
			<li
				th:class="$currentIndex == 1? 'page-item disabled': 'page-item' ">
				<a class="page-link" aria-label="Previous"
				th:href="@"
				title='Go to previous page'><span aria-hidden="true">«</span>
					<span class="sr-only">Previous</span></a>
			</li>
			<li th:each="item : $#numbers.sequence(beginIndex,endIndex)"
				th:class="$item == currentIndex ? 'page-item active' :'page-item' ">
				<a class="page-link" th:href="@$baseUrl$item"> <span
					th:text='$item'>1</span>
			</a>
			</li>
			<li
				th:class="$currentIndex == totalPageCount? 'page-item disabled': 'page-item'">
				<a class="page-link" aria-label="Next"
				th:href="@" title='Go to next page'><span
					aria-hidden="true">»</span> <span class="sr-only">Next</span></a>
			</li>
			<li
				th:class="$currentIndex == totalPageCount? 'page-item disabled':'page-item'">
				<a class="page-link" th:href="@$baseUrl$totalPageCount">Last</a>
			</li>
		</ul>
	</nav>


		</th:block>
	</div>
	<!-- /.container -->

	<footer th:replace="layout :: footer"></footer>
</body>
</html>
Dòng 29. Chúng ta dùng employees.pageList thay vì employess do đối tượng PagedListHolder.
Dòng 60-88. Phần phân trang thymeleaf. Lưu ý th:href=“@/employee“ (dòng 63)
Cú pháp nối chuỗi trong thymeleaf:
@
Chỉnh sửa phần thông báo addFlashAttribute:
@GetMapping("/employee")
	public String index(Model model,HttpServletRequest request
			,RedirectAttributes redirect)
		request.getSession().setAttribute("employeelist", null);

		if(model.asMap().get("success") != null)
			redirect.addFlashAttribute("success",model.asMap().get("success").toString());
		return "redirect:/employee/page/1";
Như bài trước, khi phương thức save hay delete gọi addFlashAttribute thì nó sẽ thông báo ra cho trang redirect (/employee) về là hãy truyền thông điệp gì đó. Nhưng bây ở đây phương thức /employee chỉ là trung gian nên mình phải chuyển thêm 1 lần addFlashAttribute qua trang /employee/page/pageNumber
Đoạn code model.asMap().get("success")để lấy giá trị của đối tượng FlashAttribute.
5. Video Hướng dẫn phân trang trong Thymeleaf và Spring Boot:
6. Download source code
Link Source: Hướng dẫn phân trang trong Thymeleaf và Spring Boot


